
the motor block
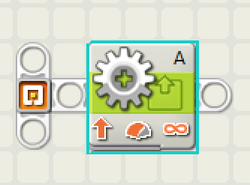
The block to the left is known as the motor block. This block is used to move a motor just as its name suggests. Inside every block there are settings that can be changed to customize each block slightly. These appear at the bottom of the window after you select the block. Let's look at those.
The first of these settings is the port. This selects which port the motor is plugged into.
Next is direction. Since the motor is circular it can only be set to either clockwise, counter-clockwise, or stop.
After this is power. This sets how fast the motor will turn. It goes from 0 to 100 because it is a percentage. 100% is the maximum possible speed of the motors. An important note to make is that with older motors you may set both to the same power but they may not travel at the same speed. This is due to the wear and tear on them. To counter this we can use the next option, motor power
The motor power option allows the robot to try and correct for motors traveling at different speeds. It will increase or decrease the power from what you set when the robot runs to make sure the left and right side move close to the same speed. (If using this does not fix your motors they are probably very old and will not be fixable using motor power).
Next is duration. This sets how long the motor will run for. Here there are a couple options for settings. The first setting is Unlimited which means that it will just start the motor and leave it running while the robot moves on in the program. The second option is Rotations. This will drive the motors until it turns a complete circle for as many times as entered in the textbox. Third is Degrees. This is the same as rotations but is instead measured in degrees rotation of the motor. So for every 1 rotation you want the motor to turn, you enter 360 degrees instead. This setting is the most accurate of all of them. Finally there is Seconds. This will run the motor for a set amount of time that you enter in the textbox. This is the least accurate of the three options because many factors can change the distance covered when running on time.
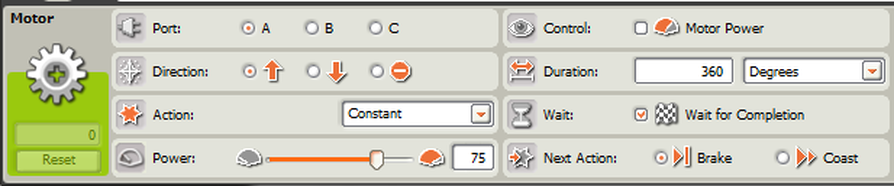
This is an example of a motor block's settings.
The next option is Wait for Completion. Under that is waiting for completion. This command tells the robot whether it should wait for this individual block to finish - reach its duration - or to set the motor to do this command and then simultaneously move on to the next. If it does move on, the motor will still move as far as you want it to while it does more things as well. The only time it won't is if you reach the end of the program, in which case the program automatically stops and the move you wanted to do will be cancelled. Notice that this option is not available when duration is on Unlimited. This is because unlimited just turns the motor on and isn't meant to wait for degrees, rotations, or time.
Finally, we have the next action. This tells the robot what to do once it has reached the desired duration. It can brake - which will make it stop immediately - or coast - which will stop the power going to the motors but won't stop them from rolling onward.
Finally, we have the next action. This tells the robot what to do once it has reached the desired duration. It can brake - which will make it stop immediately - or coast - which will stop the power going to the motors but won't stop them from rolling onward.
