
The Move Block
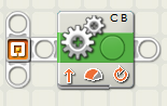
This is the Move Block. It works the same as a motor block except it can move more than one motor at a time. It also has some extra hidden features which is why the motor block was learnt before it.
First of the settings is the Port. Here you select which motor(s) you wish to run. Any number of ports can be selected as long as there is at least one.
Next is Direction. Since the motor is circular it can only be set to either clockwise, counter-clockwise, or stop. This will be applied to all motors. Be careful though, clockwise and counter-clockwise may not result in forwards and backwards if your drive motors are mounted differently.
Then there is steering. This alters the power going to each wheel from what you set to make it curve. This will only be available if you have selected only two motors from the Port section. I typically do not use this because it is inaccurate. The same curve can be achieved and changed much more accurately using two motor blocks set with different powers.
After this is power. This sets how fast the motor will turn. It goes from 0 to 100 because it is a percentage. 100% is the maximum possible speed of the motors. An important note to make is that with older motors you may set both to the same power but they may not travel at the same speed. This is due to the wear and tear on them. One of the hidden features of the move block is the motor power option. In motor blocks this can be turned on and off but in move blocks it is always on. This is because it assumes both motors are going straight and set to the same power. The power for two motors will be exactly the same. Only exceptions to this are if one motor is older than the other or steering has been altered.
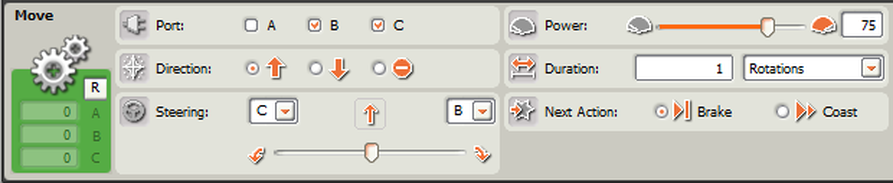
Example of move settings
Next is duration. This sets how long the motor will run for. Here there are a couple options for settings. The first setting is Unlimited which means that it will just start the motor and leave it running while the robot moves on in the program. The second option is Rotations. This will drive the motors until it turns a complete circle for as many times as entered in the textbox. Third is Degrees. This is the same as rotations but is instead measured in degrees rotation of the motor. So for every 1 rotation you want the motor to turn, you enter 360 degrees instead. This setting is the most accurate of all of them. Finally there is Seconds. This will run the motor for a set amount of time that you enter in the textbox. This is the least accurate of the three options because many factors can change the distance covered when running on time. There is another hidden feature here as well. When set to Degrees or Rotations it will reset one of the motors to zero. It looks at the Port section and which ever motor you have checked is closest to the left is the one it resets. It will never reset more than one.
You will notice there is no wait for completion here as in the motor block. Wait for completion is hidden and always set to true when duration is on degrees, rotations, or time. Unlimited is the only option that will not wait.
Finally, we have the next action. This tells the robot what to do once it has reached the desired duration. It can brake - which will make it stop immediately - or coast - which will stop the power going to the motors but won't stop them from rolling onward.
Back to Beginner Blocks
